Attic Services
Attic Insulation Removal Checklist: 29 Must-Do Steps (Bay Area)
January 28, 2026
Attic Insulation Removal is one of those home projects that looks straightforward—until you’re actually in the attic. Old insulation can be dusty, compacted, contaminated by pests, or affected by moisture. The attic itself can be cramped, hot, and full of awkward obstacles like wiring, ducts, recessed lights, and ventilation pathways. Done wrong, removal can spread dust and debris into your living space, miss hidden contamination, or set you up to install new insulation over unresolved problems.
This is a List-style checklist for Bay Area homeowners who want a clear, practical path. It covers the prep, the removal workflow, cleanup basics, and the most important “don’t skip this” steps that help your new insulation perform well afterward.
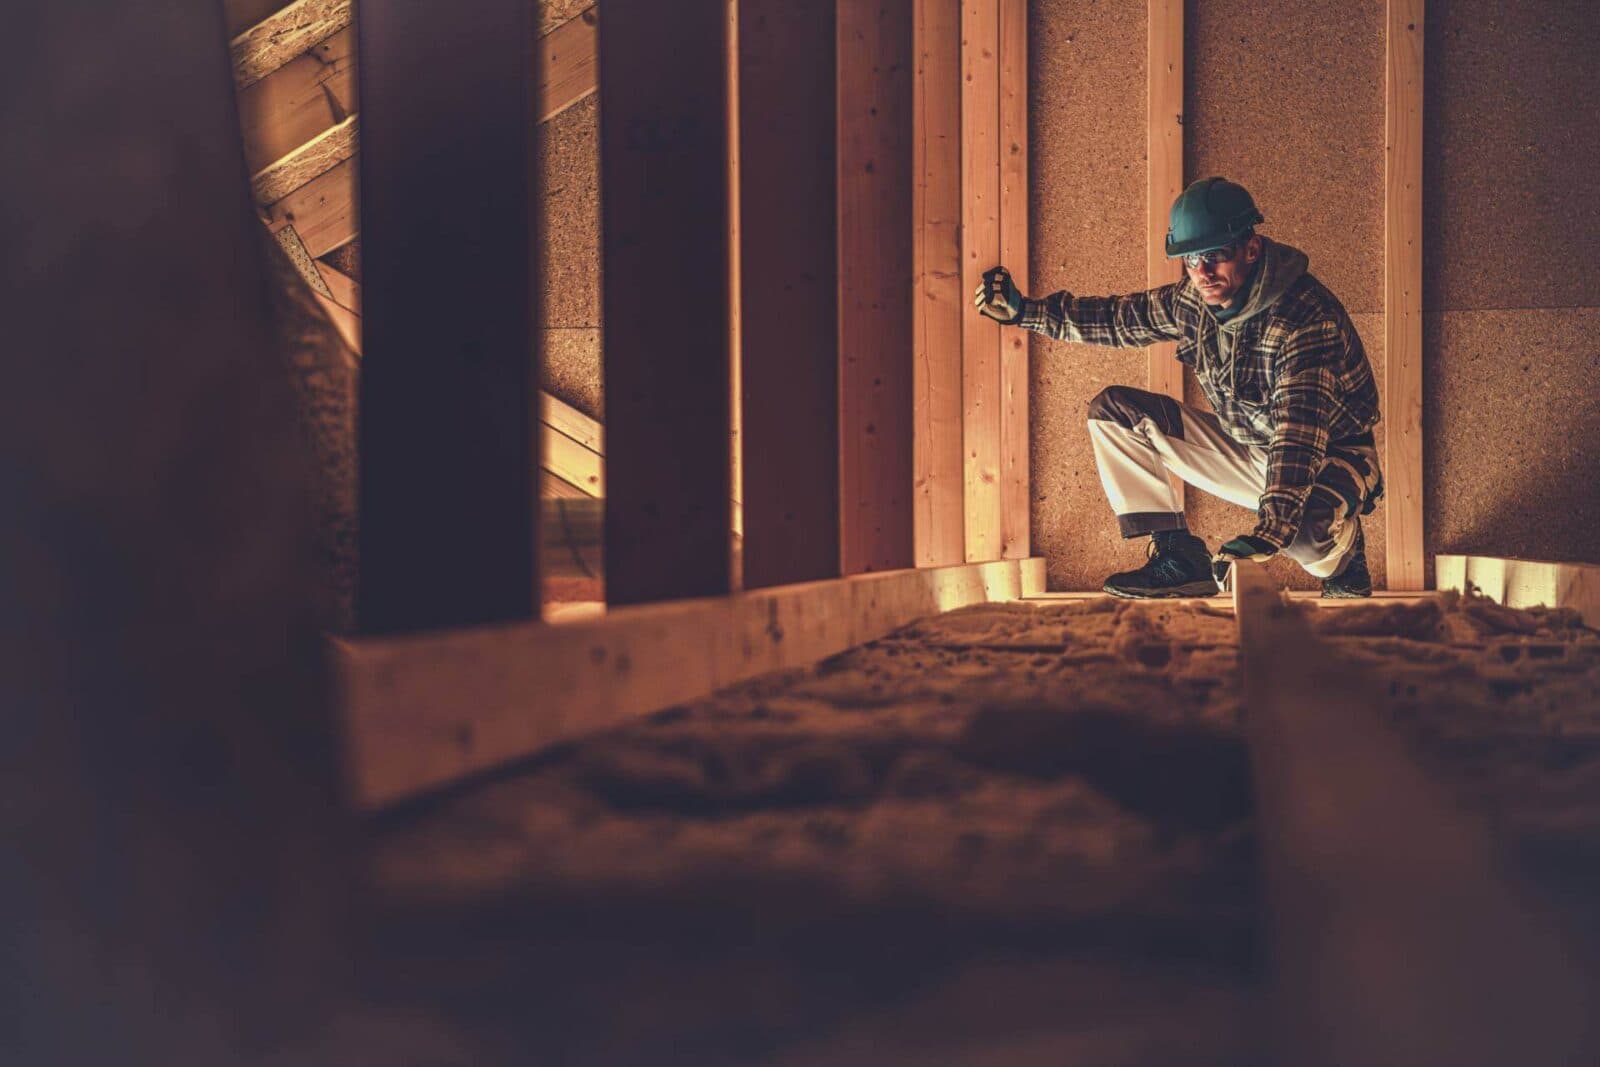
Important: Attics can contain hazards: low clearance, exposed nails, electrical wiring, sharp edges, and potentially contamination from rodents. If you suspect heavy droppings, strong odors, or unknown materials, it’s safer to treat Attic Insulation Removal as a controlled project and consider professional evaluation.
Quick Summary: What Attic Insulation Removal Should Accomplish
- Remove old, ineffective insulation that’s compacted, damaged, or uneven.
- Eliminate contamination sources (rodent evidence, debris, odor-holding material).
- Reveal hidden problems like air leaks, moisture stains, and duct issues.
- Prep the attic correctly so new insulation can be installed cleanly and evenly.
- Reduce future recurrence by sealing gaps and addressing entry points.
If you want a professional inspection and a clear plan, you can book a free estimate and get a Bay Area attic evaluation before removal begins.
The Bay Area Attic Insulation Removal Checklist (29 Steps)
-
Confirm Why You’re Removing Insulation (So You Don’t Repeat the Problem)
Start with the reason. Common drivers include old compacted insulation, uneven coverage, suspected contamination, persistent odors, rodent activity, or moisture history. Your “why” determines what else must happen (exclusion, sanitation, moisture fixes, air sealing) before re-insulating.
-
Do a Pre-Removal Attic Inspection (Photos Help)
Before touching anything, inspect and document: insulation depth/condition, dark streaks (airflow paths), nesting areas, droppings, wet spots, roof staining, and duct locations. Photos make it easier to compare “before vs after” and ensure you don’t miss areas during cleanup.
-
Identify Any Signs of Moisture
Moisture is a major red flag. Look for staining on roof decking, damp insulation, rusted nails, and musty odors. If moisture is active, removal should be paired with fixing the source (roof leak, condensation, bathroom fan venting issues). Installing new insulation without stopping moisture often leads to repeat damage.
-
Check for Rodent Evidence and Travel Paths
Droppings, tunnels through insulation, shredded nesting material, and rub marks are common signs. If rodents were present, Attic Insulation Removal should include prevention steps like sealing entry points—otherwise new insulation can be quickly disturbed and contaminated again.
-
Plan Your Containment Strategy (Don’t Spread Dust Into the Home)
Insulation removal can release dust and debris. Plan how you’ll move materials out of the attic without dragging contamination through living spaces. Cover walking paths, isolate the attic access area, and keep cleanup supplies ready.
-
Protect the Attic Access Point
The attic hatch or pull-down ladder area becomes the main “transfer zone.” Cover surfaces below, and plan to clean the access area carefully afterward. A lot of mess happens here even when the attic itself is handled well.
-
Assume You’ll Disturb Hidden Dust
Even “clean-looking” insulation can contain years of dust. Once you start moving it, particles become airborne. That’s why controlled removal and cleanup matter as much as the removal itself.
-
Identify Obstacles: Wiring, Ducts, Recessed Lights, Ventilation
Before removal, map the attic: electrical wiring runs, junction boxes, ducts, can lights, fan housings, soffit baffles, and vent pathways. This prevents accidental damage and helps you remove insulation evenly instead of “working blind.”
-
Decide If You Need Targeted Removal or Full Removal
Not every attic needs a full removal. Sometimes contamination or damage is localized. However, if insulation is very old, uneven, compacted, or repeatedly disturbed by pests, full removal can create the cleanest reset before new insulation.
-
Remove Stored Items (If Any) Before Insulation Work
If the attic is used for storage, move items out first. Storage compresses insulation and makes removal harder. It also hides problem zones. Removing storage helps reveal air leaks and damage patterns.
-
Start With the Most Contaminated Zones First
If you see nesting areas or heavy droppings, plan to remove those zones carefully and early, before they get disturbed and spread. This approach reduces cross-contamination during the process.
-
Work in Sections (So You Don’t Miss Areas)
Divide the attic into zones (by rafters, corners, or quadrants) and remove insulation systematically. Random removal tends to leave hidden patches behind, especially near eaves and tight corners.
-
Pay Extra Attention to Eaves and Edges
The edges are where insulation piles up, hides debris, and where airflow patterns often show staining. It’s also where people most commonly “skip” because it’s hard to reach. But if you leave contaminated insulation at edges, odors and pests can remain.
-
Keep Ventilation Pathways Clear During Removal
Soffit vents and baffles should remain visible and functional. Don’t damage baffles during removal. Ventilation is part of attic health, especially when you later install new insulation.
-
Remove Loose Fill Carefully (Avoid “Dust Storm” Conditions)
Loose fill removal can create airborne particles if handled aggressively. Controlled removal methods reduce spread and help keep the home cleaner. The goal is to remove material without turning the attic into a dust cloud.
-
Remove Batt Insulation Without Tearing It Into Fragments
Batts can hold debris and dust. Removing them in intact sections where possible reduces mess. Watch for batts that are damp, mold-like stained, or heavily contaminated—those should be treated as removal priorities.
-
Watch for Hidden Damage Under Insulation
Once insulation is removed, you may find: gaps in the ceiling plane, open wiring holes, duct leaks, or staining from old moisture events. These are valuable discoveries—this is the point of removal: you finally get visibility.
-
Do a “Ceiling Plane Air Leak” Scan Immediately After Removal
One of the best times to identify air leaks is right after insulation is removed. Look for penetrations around recessed lights, plumbing stacks, wiring holes, duct chases, and top plates. Air sealing at this stage dramatically improves future insulation performance.
-
Check Bathroom Fan Ducting (A Classic Bay Area Issue)
Bathroom exhaust ducts should vent outdoors, not into the attic. If they terminate inside the attic, moisture can saturate insulation and contribute to odors. Fixing venting routes before new insulation protects your next installation.
-
Inspect Roof Decking for Stains and Nail Rust
Staining can indicate roof leaks or condensation patterns. Even if the leak is not active now, evidence matters. Repair decisions are easier when you can see the attic structure clearly.
-
Inspect Ductwork for Leaks, Loose Connections, and Dust Pull
Attic duct leaks can pull dusty attic air into the HVAC system. Insulation removal gives you access to see where ducts may be compromised. A well-sealed duct system improves comfort and reduces dust issues.
-
Clean the Attic Floor and Surfaces After Removal
Once insulation is out, there’s usually a layer of fine debris and dust left behind. Cleaning helps remove odor sources and prepares the attic for air sealing work and new insulation. This step is where “it looks done” becomes “it is done.”
-
Address Contamination Properly (If Rodents Were Present)
If droppings or nesting residues are present, cleanup should be controlled. Avoid sweeping dust into the air or using household vacuums that can aerosolize particles. Proper sanitation reduces lingering odors and future problems.
-
Seal Entry Points (So Rodents Don’t Return to a Fresh Attic)
Attic Insulation Removal is wasted if rodents come right back. Exclusion may involve sealing roofline gaps, reinforcing vents, and closing penetrations that allow entry. The exact entry points vary by home, so inspection matters.
-
Air Seal Before You Re-Insulate (This Is the Best Upgrade Moment)
Air sealing is far easier when the attic is bare. Sealing around penetrations reduces drafts, improves indoor comfort, and helps insulation perform consistently. Many “my new insulation didn’t help” complaints trace back to skipped air sealing.
-
Verify Soffit Baffles and Vent Paths Are Protected
Before installing new insulation, ensure baffles are intact and paths are clear so insulation won’t block soffit vents. This helps prevent moisture buildup and maintains attic airflow.
-
Plan for Even Coverage With New Insulation
Removal is also planning: once the attic is clean, decide how new insulation will be laid for consistent depth and edge coverage. Even coverage prevents hot/cold spots and reduces discomfort in rooms below.
-
Re-Seal and Insulate the Attic Access Hatch
The attic access is a major weak point. If it’s not sealed and insulated, it can undermine your insulation upgrade and allow odor/dust transfer. Treat the hatch like part of the system, not an afterthought.
-
Do a Final “Before Re-Insulation” Walkthrough
Before new insulation goes in, confirm: attic is clean, moisture sources corrected, entry points sealed, major leaks addressed, baffles intact, ducts reviewed, and access hatch improved. This final walkthrough prevents “covering up” issues you’ll regret later.
Bonus List: 12 Common Mistakes During Attic Insulation Removal
- Removing insulation without fixing moisture sources (leaks or condensation issues remain).
- Skipping containment and spreading dust into living spaces.
- Leaving contaminated patches at edges and eaves.
- Missing air sealing while the attic is bare.
- Ignoring rodent entry points so pests return quickly.
- Damaging soffit baffles and compromising ventilation.
- Overlooking duct leaks that cause dust and comfort issues.
- Assuming “removal” automatically solves odors without sanitation.
- Not inspecting roof decking for stains and evidence of leaks.
- Compressing or disturbing wiring without mapping attic obstacles.
- Not cleaning the attic floor after removal leaving dust and debris behind.
- Re-insulating immediately before confirming the attic is truly ready.
Attic Insulation Removal Service in the Bay Area
If you want to see what a professional service typically includes, visit our Attic Insulation Removal service page for Bay Area homeowners. It outlines the overall approach and what to expect from a complete removal and cleanup plan.
When to Call Attic Pros for Attic Insulation Removal
Consider professional help if:
- you suspect widespread rodent contamination or strong odors
- insulation is old, compacted, uneven, or disturbed across large areas
- you’ve had moisture issues, leaks, or musty attic conditions
- you want a clean reset before installing new insulation
- you want air sealing and prevention handled as part of a complete solution
If you’d like an evaluation, you can book a free estimate and we’ll help confirm what your attic needs for a clean, stable setup before re-insulating.
For convenience, here’s the scheduling link again: Book a free estimate.
FAQ: Attic Insulation Removal
Do I always need to remove old insulation before adding new insulation?
Not always. If old insulation is dry, clean, and evenly distributed, it may be possible to improve or add to it. Removal is more common when insulation is contaminated, compacted, damp, heavily disturbed, or hiding issues that should be corrected first.
Why does Attic Insulation Removal help with odors?
Old insulation can trap dust, debris, and contamination residues. Removing it can eliminate odor-holding material and reveal the real odor sources so they can be addressed (sanitation, air sealing, moisture correction).
What should I do if I find droppings in the insulation?
Avoid sweeping or using household vacuums that can aerosolize particles. If droppings are widespread or insulation is heavily contaminated, controlled cleanup methods are safer and more effective.
When is the best time to air seal the attic?
Right after insulation is removed. With the attic floor exposed, it’s much easier to find and seal penetrations, top-plate gaps, and other air leaks before new insulation covers them.
Can removing insulation reveal roof leaks?
Yes. Once insulation is removed, you can see staining patterns and wet zones that were previously hidden. This helps identify whether there’s evidence of leakage or condensation that needs correction.
Why is attic access sealing important?
The attic access hatch can be a large leakage point. If it’s unsealed or uninsulated, it can undermine the benefits of new insulation and allow dust and odors to move into living areas.
Will rodents come back after removal?
They can if entry points aren’t sealed. That’s why exclusion (closing access routes) is an important part of the “complete” solution, especially in homes with previous rodent activity.
Conclusion
Attic Insulation Removal is more than pulling out old material—it’s a reset that lets you uncover hidden problems, remove contamination, and prepare the attic for long-term performance. In the Bay Area, the best results come from doing removal in the right sequence: inspect, contain, remove systematically, clean and sanitize, seal entry points, air seal, protect ventilation, then re-insulate with a plan.
To learn more about our approach, visit the Attic Insulation Removal service page.
