DIY French Drain Installation: Comprehensive Guide with Expert Tips
Installing a French Drain is a savvy way to address drainage issues in your yard. This step-by-step guide ensures that you can handle this project with ease and efficiency.
Preparation and Layout
Before digging, it’s vital to check for underground utility lines. Plan your trench route to effectively direct water away from problem areas. The trench should be around 12 to 18 inches deep, depending on the size and needs of your property.
Trench Digging and Pipe Laying
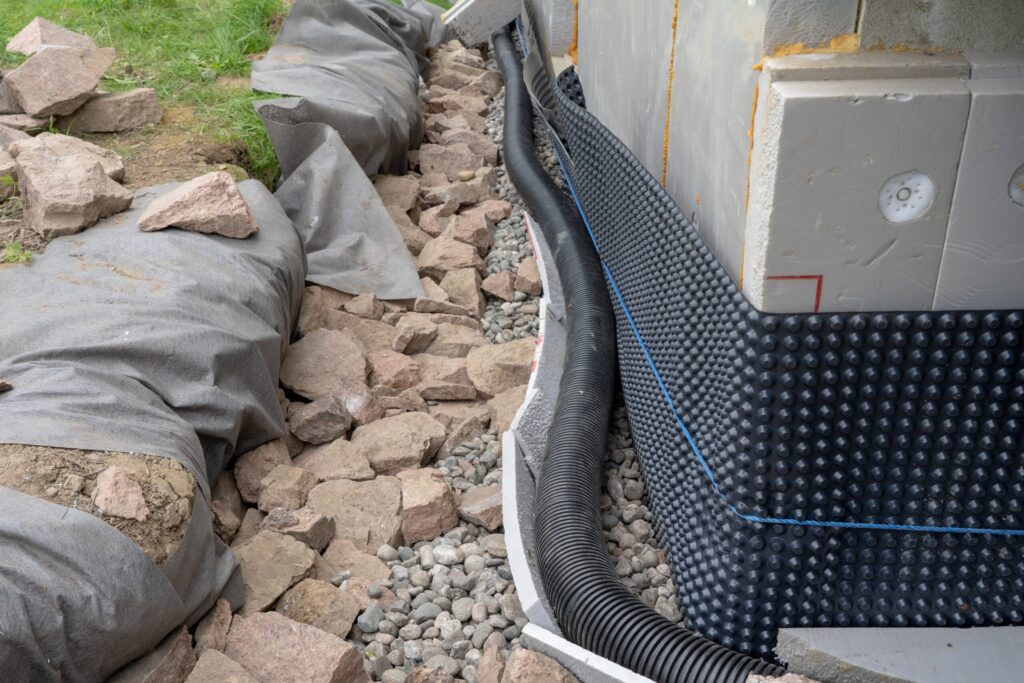
Carefully dig the trench, maintaining a consistent slope for water flow. Lay down filter fabric along the trench to prevent soil from clogging the drainage pipes. When installing the PVC pipe, ensure it’s perforated side up to maximize water collection.
Pipe Covering and Trench Filling
After laying the pipe, cover it with gravel, ensuring efficient water entry. Trim any excess fabric and then spray paint the visible parts for a neat finish. Cover the gravel with more filter fabric, then fill the rest of the trench with soil or sod to integrate it into your landscape seamlessly.
Maintenance Tips
Regularly check your French Drain system, especially the pipe and gravel area, to ensure it’s free from debris and functioning properly. The effectiveness of your French Drain largely depends on maintenance and the quality of installation.
With the right tools and our comprehensive guide, installing a French Drain can be a rewarding DIY project. Not only will it solve your standing water issues, but it also adds value to your property by improving the overall drainage system. Remember, a well-planned and executed French Drain is an investment in the health and beauty of your outdoor space.