Crawlspace Cleaning: The Bay Area Checklist (27 Must-Do Steps)
Crawlspace Cleaning is one of the most underrated home maintenance projects—until it becomes impossible to ignore. If you’ve noticed musty odors, higher indoor humidity, persistent pests, or floors that feel colder than they should, the crawl space under your home can be a major contributor. In the Bay Area, microclimates and seasonal moisture patterns can make crawl spaces especially sensitive to dampness and air quality issues.
This is a List-style guide: a step-by-step checklist you can use to understand what “done right” looks like. It covers inspection, safety, debris removal, sanitation, moisture control, and prevention—because Crawlspace Cleaning is not just “scooping out junk.” The goal is a crawl space that stays clean, dry, and less attractive to pests.
Important: Crawl spaces can contain hazards: low clearance, sharp debris, exposed nails, electrical wiring, and potentially contamination from pests. If you suspect extensive droppings, standing water, or strong odors, it’s safer to treat Crawlspace Cleaning as a controlled project and consider a professional evaluation.
Quick Summary: What Crawlspace Cleaning Should Accomplish
- Remove debris that holds moisture and attracts pests.
- Reduce odors by addressing organic material and contamination.
- Identify moisture sources (leaks, drainage, condensation) and fix them.
- Improve long-term dryness with proper ground coverage and ventilation strategy.
- Prevent return issues (rodent access points, gaps, damp zones).
If you want an expert to confirm what your crawl space needs, you can book a free estimate for a Bay Area inspection.
The Bay Area Crawlspace Cleaning Checklist (27 Steps)
-
Start With a Crawl Space “Reality Check” Inspection
Before Crawlspace Cleaning begins, confirm the baseline: standing water, mud, damp soil, insulation condition, odors, visible mold-like growth, and pest signs. A crawl space can look “mostly fine” from the access opening but be much worse deeper inside. Use a flashlight and take photos to document what you find.
-
Check Entry Access and Safety First
Many crawl spaces have tight access points. Make sure the access hatch is stable, and you can enter and exit safely. Also check for nails, sharp debris, and low beams. If you can’t move safely, professional help is the safer option.
-
Assume Dust and Particles Will Be Disturbed
Crawlspace Cleaning often stirs up dust, soil, and debris. Plan to minimize what gets tracked into the living area. Use shoe covers or dedicated shoes, and avoid bringing contaminated materials through the home without containment.
-
Identify Any Standing Water or Active Dampness
Standing water is not a “cleaning problem”—it’s a moisture and drainage problem. If there is water, identify whether it’s from a plumbing leak, rain intrusion, poor grading, or condensation. Cleaning without addressing water usually leads to repeat issues.
-
Look for Plumbing Leaks and Drips
Even a small slow leak can keep a crawl space damp. Check visible pipes for drips, wet insulation, or water stains. Also check around bathrooms and kitchens where plumbing routes may run.
-
Check for HVAC and Ducting Issues (If Present)
Some homes route ductwork through the crawl space. If ducts are leaking or poorly insulated, they can contribute to moisture and dust movement. Duct issues can also pull crawl space air upward into the home, worsening odors and indoor comfort.
-
Document Odor Patterns (A Powerful Diagnostic Clue)
Musty odor that is stronger near certain zones can point to localized dampness or contamination. If odor intensity increases after rain, moisture intrusion is likely. If odor is constant year-round, organic debris or contamination may be present.
-
Check for Rodent Activity (Droppings, Nesting, Tracks)
Crawl spaces are common rodent travel zones. Look for droppings, burrows, shredded material, and rub marks along foundation edges. If rodents are active, cleanup should be paired with exclusion (sealing access points), otherwise the problem can return.
-
Remove Large Debris First (So You Can See What’s Under It)
Start by removing obvious debris: old wood scraps, cardboard, plastic, and stored items. These materials hold moisture and create hiding spots for pests. Removing them also reveals hidden damp zones and contamination that needs attention.
-
Bag and Contain Waste (Don’t Drag It Across Clean Areas)
Use sturdy bags and a plan for moving materials out without spreading debris into the home. Crawlspace Cleaning is often messy—containment is what keeps the mess from turning into an indoor cleanup project too.
-
Remove Organic Material That Can Feed Odors
Leaves, wood pieces, and cardboard can break down and contribute to musty smells. Organic debris also attracts insects. Removing these materials is one of the fastest ways to reduce “stale crawl space” odor.
-
Evaluate Existing Ground Cover (If Any)
Some crawl spaces have an old vapor barrier or partial plastic cover. If it’s torn, bunched, or incomplete, it may not be doing much. Ground moisture can evaporate upward and keep the crawl space humid. Proper ground coverage is a major part of long-term crawl space cleanliness.
-
Inspect Subfloor Insulation Condition
Insulation under the floor can sag, tear, or become damp. If insulation is falling or has signs of contamination, it may need repair or replacement. Damaged insulation can contribute to cold floors and can hold odors if contaminated.
-
Check for Foundation Vents and Their Condition
Many crawl spaces have vents. Make sure vent screens are intact and not broken. Damaged vent screens can be entry points for pests. Also note whether vents appear blocked by debris or vegetation outside.
-
Find “Air Pathways” Between Crawl Space and Living Space
Air can move from the crawl space into the home through gaps around plumbing penetrations, duct chases, and floor openings. Sealing key gaps can reduce odor transfer and improve indoor comfort—especially if the crawl space had contamination or dampness.
-
Spot Mold-Like Growth Carefully (Focus on Moisture Source)
If you see discoloration or growth on wood, the priority is identifying why that area is damp. Cleaning without fixing the moisture cause often leads to recurrence. A professional assessment may be recommended when growth appears widespread or the source is unclear.
-
Clean Up Fine Debris and Dust Layers
After the big debris is removed, you can address the fine layer: soil dust, insulation fragments, and old debris mats. Removing fine debris reduces odor sources and makes it easier to see new issues in the future.
-
Address Contamination Zones (If Pests Were Present)
If droppings or urine residues are present, sanitation should be approached carefully. Avoid sweeping or using household vacuums that can aerosolize particles. Controlled cleanup methods help reduce exposure and keep contamination from spreading.
-
Correct the Moisture Driver (Drainage, Leaks, or Intrusion)
Crawlspace Cleaning becomes “permanent” only when moisture sources are addressed. Common drivers include poor exterior grading, clogged drainage routes, downspouts that dump near the foundation, plumbing leaks, and rain intrusion through foundation gaps.
-
Consider Exterior Water Management (The Often-Missed Step)
Many crawl space moisture problems start outside. Ensure water is directed away from the foundation. If water collects near the home during rain, the crawl space will be more prone to dampness—even if you cleaned everything inside perfectly.
-
Install or Refresh Ground Moisture Protection (Vapor Barrier Basics)
Ground moisture can continuously evaporate into the crawl space. A proper vapor barrier (when appropriate for your crawl space strategy) helps reduce humidity and keeps the space cleaner long-term. The barrier should be continuous, well-laid, and not left torn or bunched.
-
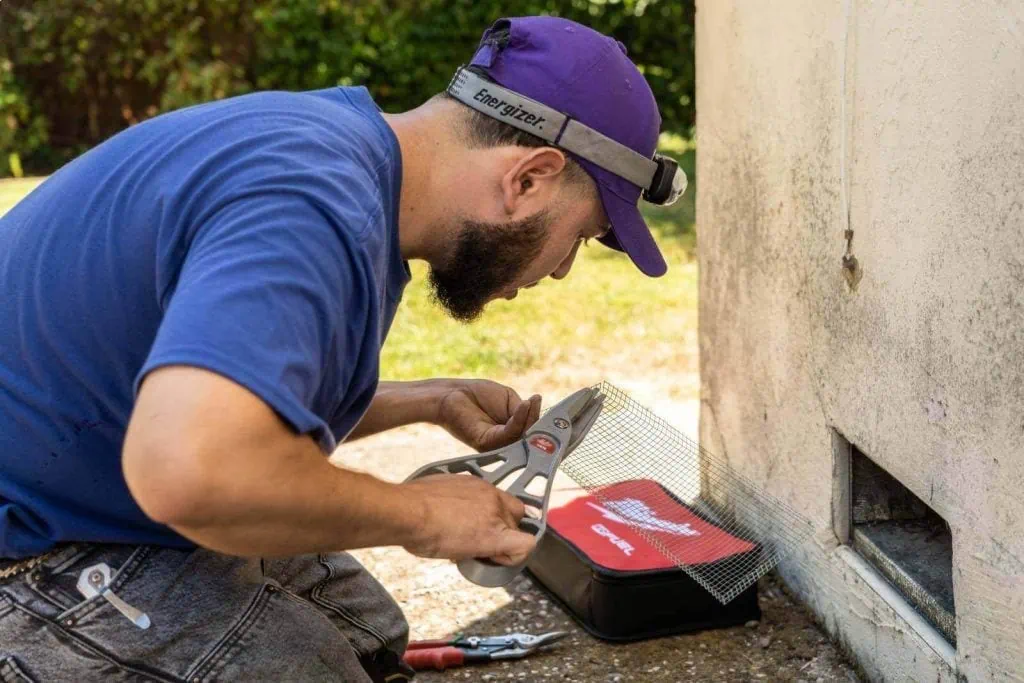
Seal Rodent Entry Points (If Activity Was Found)
If rodents were present, Crawlspace Cleaning should include prevention. Identify gaps around vents, utility penetrations, and foundation edges. Sealing access points helps stop repeat infestations that would undo the cleanup.
-
Re-check Insulation After Cleanup
Once the crawl space is cleaner, it’s easier to see whether insulation needs re-securing, replacement, or repositioning. Proper insulation helps with comfort and can reduce temperature swings that contribute to condensation patterns.
-
Improve Crawl Space Access Door Seal
A loose crawl space access door can allow pests and moist air to enter. It can also allow crawl space odors to escape. Improving the access seal is a small step that supports long-term cleanliness.
-
Create a “Maintenance-Ready” Crawl Space
A clean crawl space should be easy to monitor. Remove obstacles, ensure a clear visual line to key areas (plumbing, vents, insulation), and keep the space organized. This makes future inspections faster and catches problems early.
-
Do a Final Odor and Dampness Walkthrough
After cleaning, revisit the space and note whether the musty smell has reduced and whether damp zones remain. If dampness persists, moisture control needs additional work. Cleaning is only one part of a stable crawl space.
-
Schedule a Follow-Up Check After Rain
Many issues reveal themselves after weather events. A follow-up inspection after rain helps confirm that water management and moisture control steps are working. This is one of the best ways to ensure Crawlspace Cleaning results last.
Bonus List: 10 Crawl Space Problems That Cleaning Alone Won’t Fix
- Active plumbing leaks that keep the area damp.
- Exterior drainage failures that push water toward the foundation.
- Broken vent screens that allow pest entry.
- Open utility penetrations that create rodent pathways.
- Severely sagging insulation that needs reattachment or replacement.
- Disconnected ducts that dump conditioned air into the crawl space.
- Persistent condensation drivers that require ventilation/strategy changes.
- Structural wood issues that need professional assessment.
- Heavy contamination that requires controlled sanitation.
- Recurring rodent pressure without full exclusion measures.
Crawlspace Cleaning Services in the Bay Area
If you want to see what a professional service typically includes, visit our Crawlspace Cleaning service page for Bay Area homeowners. It covers the overall approach and what to expect from a proper crawl space cleanup and stabilization plan.
Prevention Checklist: Keep Your Crawl Space Cleaner for Longer
- Keep water moving away from the foundation: manage downspouts and surface runoff.
- Maintain vent screens and access points: reduce pest entry routes.
- Avoid storing cardboard/organic materials: they hold moisture and attract pests.
- Monitor for leaks: especially near bathrooms and kitchens.
- Inspect after rain: confirm moisture stays controlled.
- Keep an eye on insulation: sagging insulation can signal moisture or pest issues.
When to Call Attic Pros for Crawlspace Cleaning in the Bay Area
Consider professional help if:
- there is standing water, mud, or persistent dampness
- musty odors are strong and recurring
- you find droppings or signs of rodent activity
- insulation is sagging, damaged, or contaminated
- you suspect the crawl space air is impacting indoor air quality
If you’d like an evaluation, you can book a free estimate and we’ll help identify what your crawl space needs for a clean, dry, stable result.
For convenience, here’s the scheduling link again: Book a free estimate.
FAQ: Crawlspace Cleaning
How do I know if my crawl space is causing indoor odors?
If musty odor is stronger near floor level or increases when the home is closed up, the crawl space may be contributing. Air leaks between crawl space and living space can carry odors upward. An inspection can confirm odor sources and pathways.
Is Crawlspace Cleaning mainly about removing debris?
Debris removal is important, but long-term results depend on moisture control and prevention. If the crawl space stays damp, odors and pests often return regardless of how clean it looks right after cleanup.
Can crawl space moisture affect comfort?
Yes. Damp crawl spaces can increase indoor humidity and contribute to cold floors, especially if insulation is missing or damaged. Reducing moisture and restoring insulation improves comfort.
Do I always need a vapor barrier?
Not always—it depends on the crawl space strategy, ventilation, and moisture conditions. The key is to reduce ground moisture evaporation into the space. A professional evaluation can help determine the best approach for your specific crawl space.
What’s the biggest reason crawl spaces get musty?
Moisture plus organic material. Water intrusion, ground moisture evaporation, and debris can combine to create a stale odor environment. Cleaning helps, but controlling moisture is what prevents recurrence.
How often should a crawl space be checked?
A basic check after heavy rain and periodic inspections can catch problems early. If your home has a history of moisture or pests, more frequent checks may be worthwhile.
Can rodents live in crawl spaces year-round?
Yes. Crawl spaces provide shelter and access pathways. If entry points are open and attractants exist, rodents may return. Exclusion and prevention are important parts of keeping the area clean.
What should I avoid doing if I find droppings?
Avoid sweeping or using a household vacuum that can aerosolize particles. If droppings are widespread, controlled cleanup methods are safer and more effective.
Conclusion
Crawlspace Cleaning is most effective when it’s treated as a system: remove debris, address contamination, identify and correct moisture sources, improve ground moisture protection, and prevent pest access. In the Bay Area, where moisture patterns can vary by neighborhood and season, the “clean + dry + monitored” approach is what keeps crawl spaces from sliding back into musty, pest-prone conditions.
To learn more about our approach, visit the Crawlspace Cleaning service page.