Insulation
Vapor Barrier vs Encapsulation (Bay Area Crawl Space Guide)
February 26, 2026
If your crawl space stays damp in rainy months, smells musty, or keeps attracting pests, you’ve probably heard two common solutions: vapor barrier installation and crawl space encapsulation.
They sound similar — but they’re not the same.
A vapor barrier is often the first upgrade for controlling moisture from the ground. Encapsulation is a more comprehensive system designed to reduce humidity, improve long-term cleanliness, and limit pest entry points.
This guide covers:
-
What a vapor barrier is (and what it isn’t)
-
What full encapsulation adds
-
When a dehumidifier is helpful — and when it’s not
-
Practical benefits (with careful, realistic language)
-
Cost factors and example scenarios (without fake numbers)
-
A simple decision tree to choose the right path
-
Next steps: inspection + moisture assessment
✅ Get an encapsulation assessment & estimate
If you want clarity on your crawl space conditions and options, start with a professional assessment.
Request an Assessment
What a vapor barrier is (and why it helps)
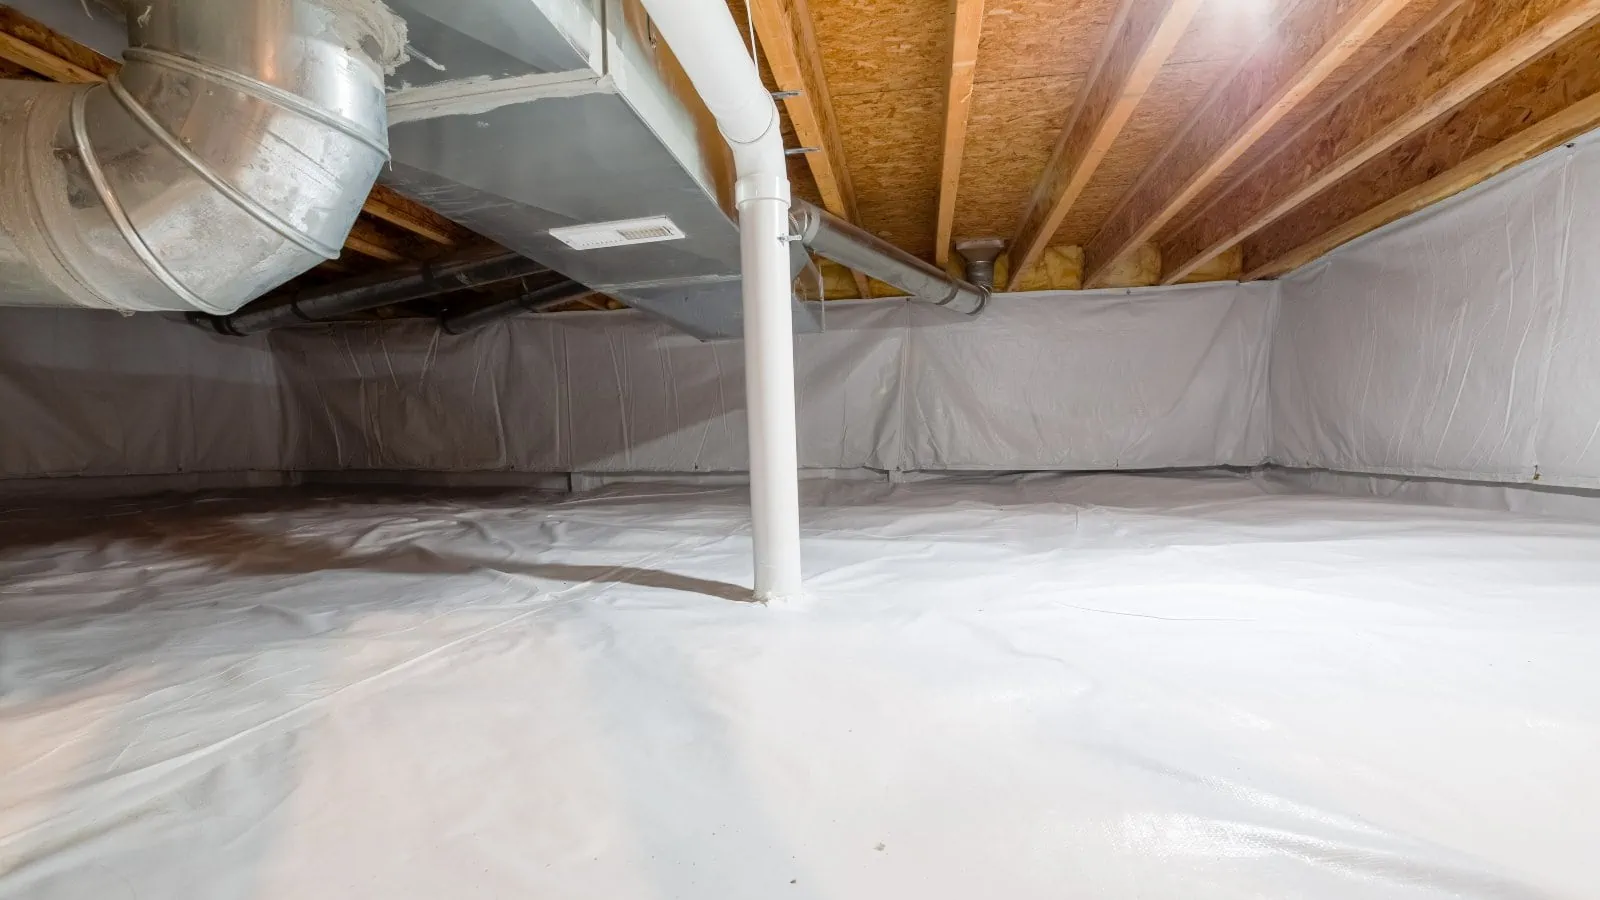
A vapor barrier is a moisture-control layer installed over exposed soil (and sometimes up the walls) to reduce water vapor migration from the ground into the crawl space air.
Material basics (keep it practical)
-
6-mil plastic is the minimum commonly used for basic vapor barriers
-
In many cases, reinforced liners are more durable, especially in crawl spaces that are accessed for maintenance or have irregular surfaces
-
The effectiveness depends heavily on seam sealing and detailing
The detail that matters most: seams & sealing
A vapor barrier isn’t just “plastic on dirt.” The real performance comes from:
-
overlapped seams
-
sealed seams (tape/adhesives designed for liners)
-
sealed edges and transitions
-
clean detailing around piers, posts, and penetrations
If seams are loose and edges are open, moisture can still move around the liner and the crawl space may stay humid.
What full encapsulation adds
Encapsulation is a step beyond “ground cover.” Think of it as turning the crawl space into a cleaner, more controlled environment.
A typical encapsulation system may include:
Wall liner
-
A liner on crawl space walls to reduce moisture transfer through masonry and surfaces (scope depends on the home)
Sealing vents
-
Many encapsulation systems include sealing or conditioning vent openings to reduce outside damp air intrusion and limit pest entry points
-
This is home-specific and should be assessed, not assumed
Detailing penetrations (the leak points)
-
Proper sealing around:
-
plumbing penetrations
-
utility lines
-
access points
-
corners and transitions
-
Door access upgrades
-
Better access doors / sealing around crawl space entry improves long-term performance and prevents the “open hatch problem”
Monitoring
-
Many encapsulation strategies benefit from monitoring humidity (simple gauges or more advanced monitoring depending on preference)
Dehumidifier: when it’s needed (and when not)
A dehumidifier is not automatically required — and it’s not a replacement for poor sealing.
A dehumidifier can be helpful when:
-
humidity stays elevated seasonally even after barrier/sealing work
-
the crawl space is naturally prone to moisture (site conditions)
-
you want tighter humidity control for odor and durability goals
-
the crawl space is being treated as a more controlled zone
A dehumidifier may NOT be necessary when:
-
moisture issues are primarily from obvious water entry (drainage/leaks) that must be fixed first
-
the crawl space is already staying dry after basic improvements
-
ventilation and conditions are stable and humidity readings remain low
The right approach is: address moisture sources + install the correct barrier system + add dehumidification only if needed.
Benefits (realistic outcomes, carefully stated)
Encapsulation and vapor barriers can improve crawl space conditions — but outcomes vary by home.
Comfort (may improve)
-
Floors may feel less cold or damp depending on overall insulation and air sealing
-
Indoor comfort can improve when crawl space humidity is better controlled
Odor reduction (often improves)
-
Musty smell often decreases when moisture and organic decay conditions are reduced
-
Odor reduction is usually strongest when the space is cleaned first
Pest pressure (can be reduced)
-
Sealing vents/openings and improving cleanliness can reduce pest harborage and entry opportunities
-
It’s not a “magic force field,” but it can make the crawl space far less attractive
Durability (can help long-term)
-
Controlling moisture can reduce the conditions that contribute to gradual material stress over time
-
The goal is keeping the space drier and more stable across seasons
Crawl Space Cleaning
Rodent proofing exclusion
Cost ranges (what affects cost) + example scenarios
Instead of fake numbers, here’s what actually drives scope and cost:
Key cost drivers
-
crawl space square footage
-
clearance height (tight spaces take longer)
-
access difficulty (small entry, obstacles)
-
whether cleaning/debris removal is required first
-
wall liner requirements and complexity
-
number of penetrations, piers, and detailing points
-
vent sealing complexity
-
whether a dehumidifier is included
-
moisture severity and whether drainage/leaks must be addressed first
Example scenarios (no exact pricing, just scope)
Scenario A: Small home, straightforward access
-
basic vapor barrier with well-sealed seams
-
minor detailing around a few piers
-
typically the simplest scope
Scenario B: Medium home, musty odor each winter
-
crawl space cleaning + reinforced vapor barrier
-
improved sealing at vents/penetrations
-
optional humidity monitoring
Scenario C: сложный доступ / хроническая сырость
-
full encapsulation: ground + wall liner
-
vent strategy + detailed sealing
-
dehumidifier if humidity remains elevated after sealing
-
more labor + more materials + more detailing time
The fastest way to understand your category is a crawl space inspection with moisture assessment.
How to decide (decision tree)
Use this quick decision guide:
Step 1 — Is there standing water or an active leak?
-
Yes → address drainage / leak source first (then proceed)
-
No → go to Step 2
Step 2 — Is the crawl space damp or musty most rainy months?
-
Yes → vapor barrier likely needed (at minimum)
-
No → cleaning + periodic checks may be enough
Step 3 — Do odors persist or return each season?
-
Yes → consider reinforced barrier + better sealing/detailing
-
No → basic barrier may be sufficient
Step 4 — Do you want a long-term controlled system?
(especially if you’ve had recurring moisture/pests)
-
Yes → encapsulation is a strong candidate
-
No → vapor barrier + targeted improvements may be appropriate
Step 5 — After barrier/sealing, is humidity still high?
-
Yes → dehumidifier may help maintain stability
-
No → you may not need one
Next steps: inspection + moisture assessment
A practical workflow that avoids wasted spend:
-
Inspect the crawl space (moisture patterns, vent condition, entry points)
-
Clean if needed (debris/organic material/old insulation)
-
Decide: vapor barrier vs encapsulation based on conditions and goals
-
Detail and seal penetrations and transitions properly
-
Add dehumidification only if humidity remains elevated
-
Follow up with basic monitoring and periodic checks
✅ Get an encapsulation assessment & estimate
Request an Assessment
FAQ
Does encapsulation trap moisture?
If done incorrectly, it can create problems — which is why detailing, sealing, and addressing moisture sources matters. A proper system is designed to manage moisture, not trap it.
Do you need vents sealed?
Often, vent strategy is part of encapsulation — but it’s home-specific. Some crawl spaces benefit from sealing vents as part of a controlled system. An inspection determines the right approach.
Is mold guaranteed to go away?
No. There are no guarantees. Controlling moisture can reduce the conditions that support growth, but outcomes depend on materials, existing conditions, and ongoing moisture control.
How long does it last?
A well-installed reinforced liner and properly sealed system can last many years. Longevity depends on material quality, installation detail, and whether the crawl space is frequently accessed or disturbed.
Can pests still enter after encapsulation?
It can significantly reduce pest entry opportunities, especially when vents and penetrations are sealed — but it’s not absolute. If pest pressure is high, exclusion work may still be required.
Do I need a dehumidifier?
Not always. It’s most useful when humidity remains elevated after barrier and sealing improvements, or when you want tighter control in a sealed crawl space system.
