Pest and Rodent Control
Rodent Removal Checklist: 31 Must-Do Steps (Bay Area)
January 30, 2026
Rodent Removal is one of those home problems that can feel deceptively simple—until it keeps coming back. Many homeowners start with a few traps and some cleaning, only to discover new droppings weeks later, fresh scratching sounds at night, or a persistent odor that never fully disappears. In the Bay Area, rodents can be persistent because homes offer shelter, mild conditions, landscaping cover, and steady food and water sources.
This is a List-style, step-by-step checklist designed to show what “Rodent Removal done right” should look like. The goal is not only to remove active rodents, but to stop the cycle: inspection → removal → exclusion → cleanup → prevention.
Important: Rodent activity can involve contamination and safety risks, especially in attics and crawl spaces. If you suspect widespread droppings, nesting material, or chewed wiring, it’s safer to treat this as a controlled project and consider professional help.
Quick Summary: What Rodent Removal Should Accomplish
- Confirm rodent activity and identify the species (rats vs mice matters).
- Reduce active rodent presence using an organized plan.
- Seal entry points so new rodents can’t enter.
- Clean contamination safely to reduce odors and attractants.
- Prevent recurrence by removing food/water sources and keeping access points secure.
If you want a Bay Area inspection and a clear plan, you can book a free estimate.
The Bay Area Rodent Removal Checklist (31 Steps)
-
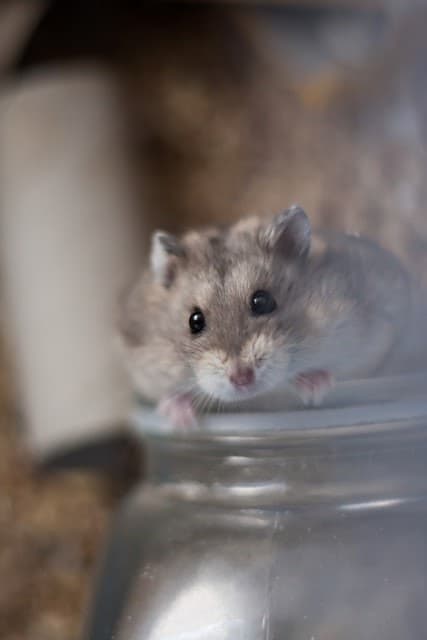
Identify Your Primary Rodent Problem (Rats vs Mice)
“Rodents” isn’t one problem. Mice and rats behave differently and use different entry routes. Early identification improves results. Large droppings, louder noises, and more visible damage often suggest rats. Smaller droppings and subtle signs often suggest mice.
-
Confirm Activity With a Simple Signs Check
Look for droppings, gnaw marks, scratching noises, greasy rub marks along travel paths, and nesting materials. Rodent Removal is easiest when you catch activity early.
-
Map the “Hot Zones” (Where Activity Is Concentrated)
Common hotspots include attics, crawl spaces, garages, kitchen edges, laundry rooms, and storage areas. Take photos and notes. This prevents random guessing and helps you target the real pathways.
-
Check for Odor Patterns
Rodent odor is often strongest near nests, droppings concentrations, or contaminated insulation. If odor intensifies when HVAC runs, it may indicate attic contamination and air leaks into living space.
-
Inspect the Exterior First (Most Homeowners Skip This)
Rodent Removal fails long-term if the home stays accessible. Walk the perimeter and look for gaps along the foundation, vents, utility penetrations, and garage edges. Many entry points are outside, not inside.
-
Check Roofline and Attic Entry Routes
In Bay Area homes, roofline gaps, vents, fascia transitions, and eaves can be major access routes. Even small weaknesses can become repeat entry points.
-
Inspect Crawl Space Vents and Access Door
Damaged vent screens and loose crawl space access doors are common entry points. If the crawl space is accessible, rodents can travel under the home and emerge in walls or attic spaces.
-
Identify Utility Penetrations
Pipes, AC lines, wiring, and conduits often create gaps. These penetrations can be “invisible highways” for rodents moving from outside into interior cavities.
-
Reduce Easy Food Sources Immediately
Before removal is even complete, remove attractants: unsecured pantry items, pet food left out, bird seed, and accessible trash. If food remains abundant, rodents are harder to eliminate and more likely to return.
-
Reduce Easy Water Sources
Rodents need water too. Check for drips, damp zones, pet bowls overnight, and irrigation overspray that keeps areas wet near the foundation.
-
Declutter Rodent-Friendly Zones
Storage piles, cardboard, and clutter create hiding places. Removing clutter doesn’t “solve” rodents, but it reduces shelter and makes inspection and removal far more effective.
-
Choose a Removal Strategy That Matches the Situation
Rodent Removal typically requires an organized approach rather than random placement. Focus on travel routes, hotspots, and consistent patterns. A scattered approach often wastes time and misses the true pathways.
-
Focus on Travel Paths, Not Random Spots
Rodents tend to hug edges and follow consistent routes. Signs like rub marks and droppings help identify where they actually move.
-
Don’t Skip Exclusion Planning While Removal Is Happening
Removal reduces activity. Exclusion stops re-entry. If you wait too long to plan sealing work, new rodents can move in even as you remove the current ones.
-
Seal the Biggest Entry Points First (Then Work to Smaller Ones)
Start with obvious gaps: damaged vents, large cracks, open utility penetrations, or poorly sealed access points. These are the “main doors.” Then address smaller weaknesses.
-
Keep Ventilation Functional (Don’t “Seal Everything” Blindly)
Some vents are necessary for airflow. Rodent-proofing should reinforce vents (screens, covers) without blocking required ventilation pathways. This is where professional experience helps prevent accidental moisture problems.
-
Confirm Attic Conditions If Rodents Were Present Upstairs
Attic Rodent Removal is often more complex because contamination can affect insulation and odors can spread downward through air leaks. A proper attic check is key if you heard noises above the ceiling.
-
Check for Chewed Wiring and Safety Risks
Chewed wiring is a serious warning sign. If you see damage, prioritize safe evaluation. Rodents can gnaw insulation around wiring and create hazards that should not be ignored.
-
Plan Cleanup as Part of Removal (Not as an Afterthought)
Droppings, urine residues, nesting debris, and contaminated insulation can keep odors and attractants present even after rodents are gone. Cleanup helps “close the loop” so the home becomes less attractive.
-
Avoid DIY Mistakes That Spread Contamination
Avoid sweeping droppings into the air or using household vacuums that can aerosolize particles. Controlled cleanup methods reduce spread and reduce exposure.
-
Remove Contaminated Nesting Material Safely
Nesting zones often contain concentrated contamination. Removing nests reduces odor and makes it easier to detect new activity later.
-
Inspect Insulation for Tunnels, Compression, and Odor Retention
Rodents often tunnel through insulation and create nests. Disturbed insulation loses effectiveness and can hold odors. In many cases, a rodent case becomes an “attic system” project: removal + cleanup + insulation restoration.
-
Air Seal Key Leaks That Move Attic/Crawl Space Air Into the Home
Air leaks around ceiling penetrations, duct chases, and plumbing stacks can carry odors and particles into living space. Sealing these pathways improves indoor comfort and helps prevent lingering smells.
-
Re-check the Perimeter After Sealing Work
Exclusion should be thorough. After you seal the obvious gaps, do another perimeter pass. It’s common to find secondary gaps once you start looking closely.
-
Inspect Landscaping “Bridges” to the Roof
Branches and dense plants can provide access routes. Rodents can climb and reach roofline gaps more easily when vegetation touches the home.
-
Monitor for Activity Signals in the Following Days
After removal and sealing, activity should drop. Continue checking for new droppings, noises, and disturbed materials. Monitoring helps confirm success early.
-
Confirm the Attic and Crawl Space Are Cleaned Enough to Stay “Readable”
A clean space makes new problems obvious. If the attic/crawl space remains cluttered or contaminated, it’s harder to tell whether rodents are returning.
-
Re-secure Storage and Food Habits (So You Don’t Re-Attract Rodents)
Rodent Removal is easier to maintain when pantry storage is sealed, pet food is controlled, and trash is secured. If attractants remain, the home stays “worth it” for rodents in the neighborhood.
-
Schedule a Follow-Up Inspection After Weather Changes
Some entry points become obvious after rain, wind, or seasonal changes. A follow-up check helps ensure sealing remains intact and moisture conditions remain stable.
-
Re-check Crawl Space Vents and Screens Periodically
Even small damage to vent screens can reopen access. Periodic checks prevent a small breach from turning into a full rodent problem again.
-
Keep a Simple “Rodent Log” for 2–3 Weeks
Write down any noises, sightings, or new droppings and where they occur. This helps confirm success and provides valuable info if additional steps are needed.
-
Know When It’s Time to Bring in Pros
If activity is widespread, recurring, or involves attic/crawl space contamination, professional Rodent Removal is often faster and more reliable because it combines inspection, exclusion, and controlled cleanup.
Bonus List: 14 Common Rodent Removal Mistakes to Avoid
- Using only traps without sealing entry points.
- Cleaning droppings incorrectly and spreading contamination into the air.
- Ignoring attic/crawl space activity and focusing only on visible rooms.
- Leaving food and water attractants unchanged.
- Sealing the wrong things and accidentally compromising ventilation.
- Assuming one entry point is the only entry point.
- Not inspecting roofline where many rats travel.
- Skipping cleanup and leaving odor sources behind.
- Not checking insulation for tunnels and nests.
- Forgetting the crawl space as a hidden travel route.
- Not monitoring afterward to confirm results.
- Ignoring chewed wiring and safety risks.
- Letting vegetation touch the home and re-creating access.
- Underestimating neighborhood pressure (rodents move between properties).
Rodent Removal Service in the Bay Area
If you want to see what a professional service typically includes, visit our Rodent Removal service page for Bay Area homeowners. It outlines the overall approach and what to expect from inspection, removal, sealing, and prevention.
When to Call Attic Pros for Rodent Removal
Consider professional help if:
- you see droppings in multiple areas or hear persistent noises
- rodents have been in the attic or crawl space
- odors persist or seem tied to HVAC/attic conditions
- you suspect chewed wiring or widespread nesting
- DIY attempts haven’t stopped the problem from returning
If you’d like an evaluation, you can book a free estimate and we’ll help confirm the scope and the most effective next steps.
For convenience, here’s the scheduling link again: Book a free estimate.
FAQ: Rodent Removal
Why does Rodent Removal fail so often?
Because removal alone doesn’t stop re-entry. If entry points remain open and attractants remain present, new rodents can move in. The long-term solution usually requires exclusion (sealing access routes) plus prevention.
How do I know if the attic is involved?
Common clues include scratching sounds above ceilings, insulation disturbance, droppings near attic access, and odors that seem stronger when HVAC runs. An attic inspection can confirm activity and contamination.
Do I need to clean after rodents are removed?
Cleanup often matters because droppings, urine residue, and nesting material can keep odors and attractants present. Cleaning also helps make the space “readable” so you can detect new activity quickly.
Can rodents affect indoor comfort?
Yes. Rodent activity can disturb insulation and create uneven temperature zones. Odors can also travel into living spaces through air leaks, especially from attics and crawl spaces.
How do rodents get into homes in the Bay Area?
Common routes include roofline gaps, vents with compromised screens, utility penetrations, crawl space access doors, and foundation openings. Landscaping can also create “bridges” that make roof access easier.
How long should I monitor after Rodent Removal?
Monitoring for a few weeks helps confirm success. Look for new droppings, noises, and disturbed materials. If signs continue, additional sealing or targeted work may be needed.
What should I do if I find droppings?
Avoid sweeping or using a household vacuum that can aerosolize particles. If droppings are widespread or in insulation, controlled cleanup methods are safer and more effective.
Conclusion
Rodent Removal is most successful when you treat it as a complete system: confirm activity, remove rodents with a structured plan, seal entry points, clean contamination, and prevent re-attraction. In Bay Area homes, skipping exclusion is the most common reason rodents return. Use this checklist to keep the process organized and ensure the result lasts.
To learn more about our approach, visit the Rodent Removal service page.
